- My Landscape Photography
- Cameras
- Saramonic Blink 100 Wireless Microphone
- Fotopro X-Aircross 2 Carbon Tripod
- The Eckla-Camfix Car Window Mount
- Filters
- Accessories
My Landscape Photography
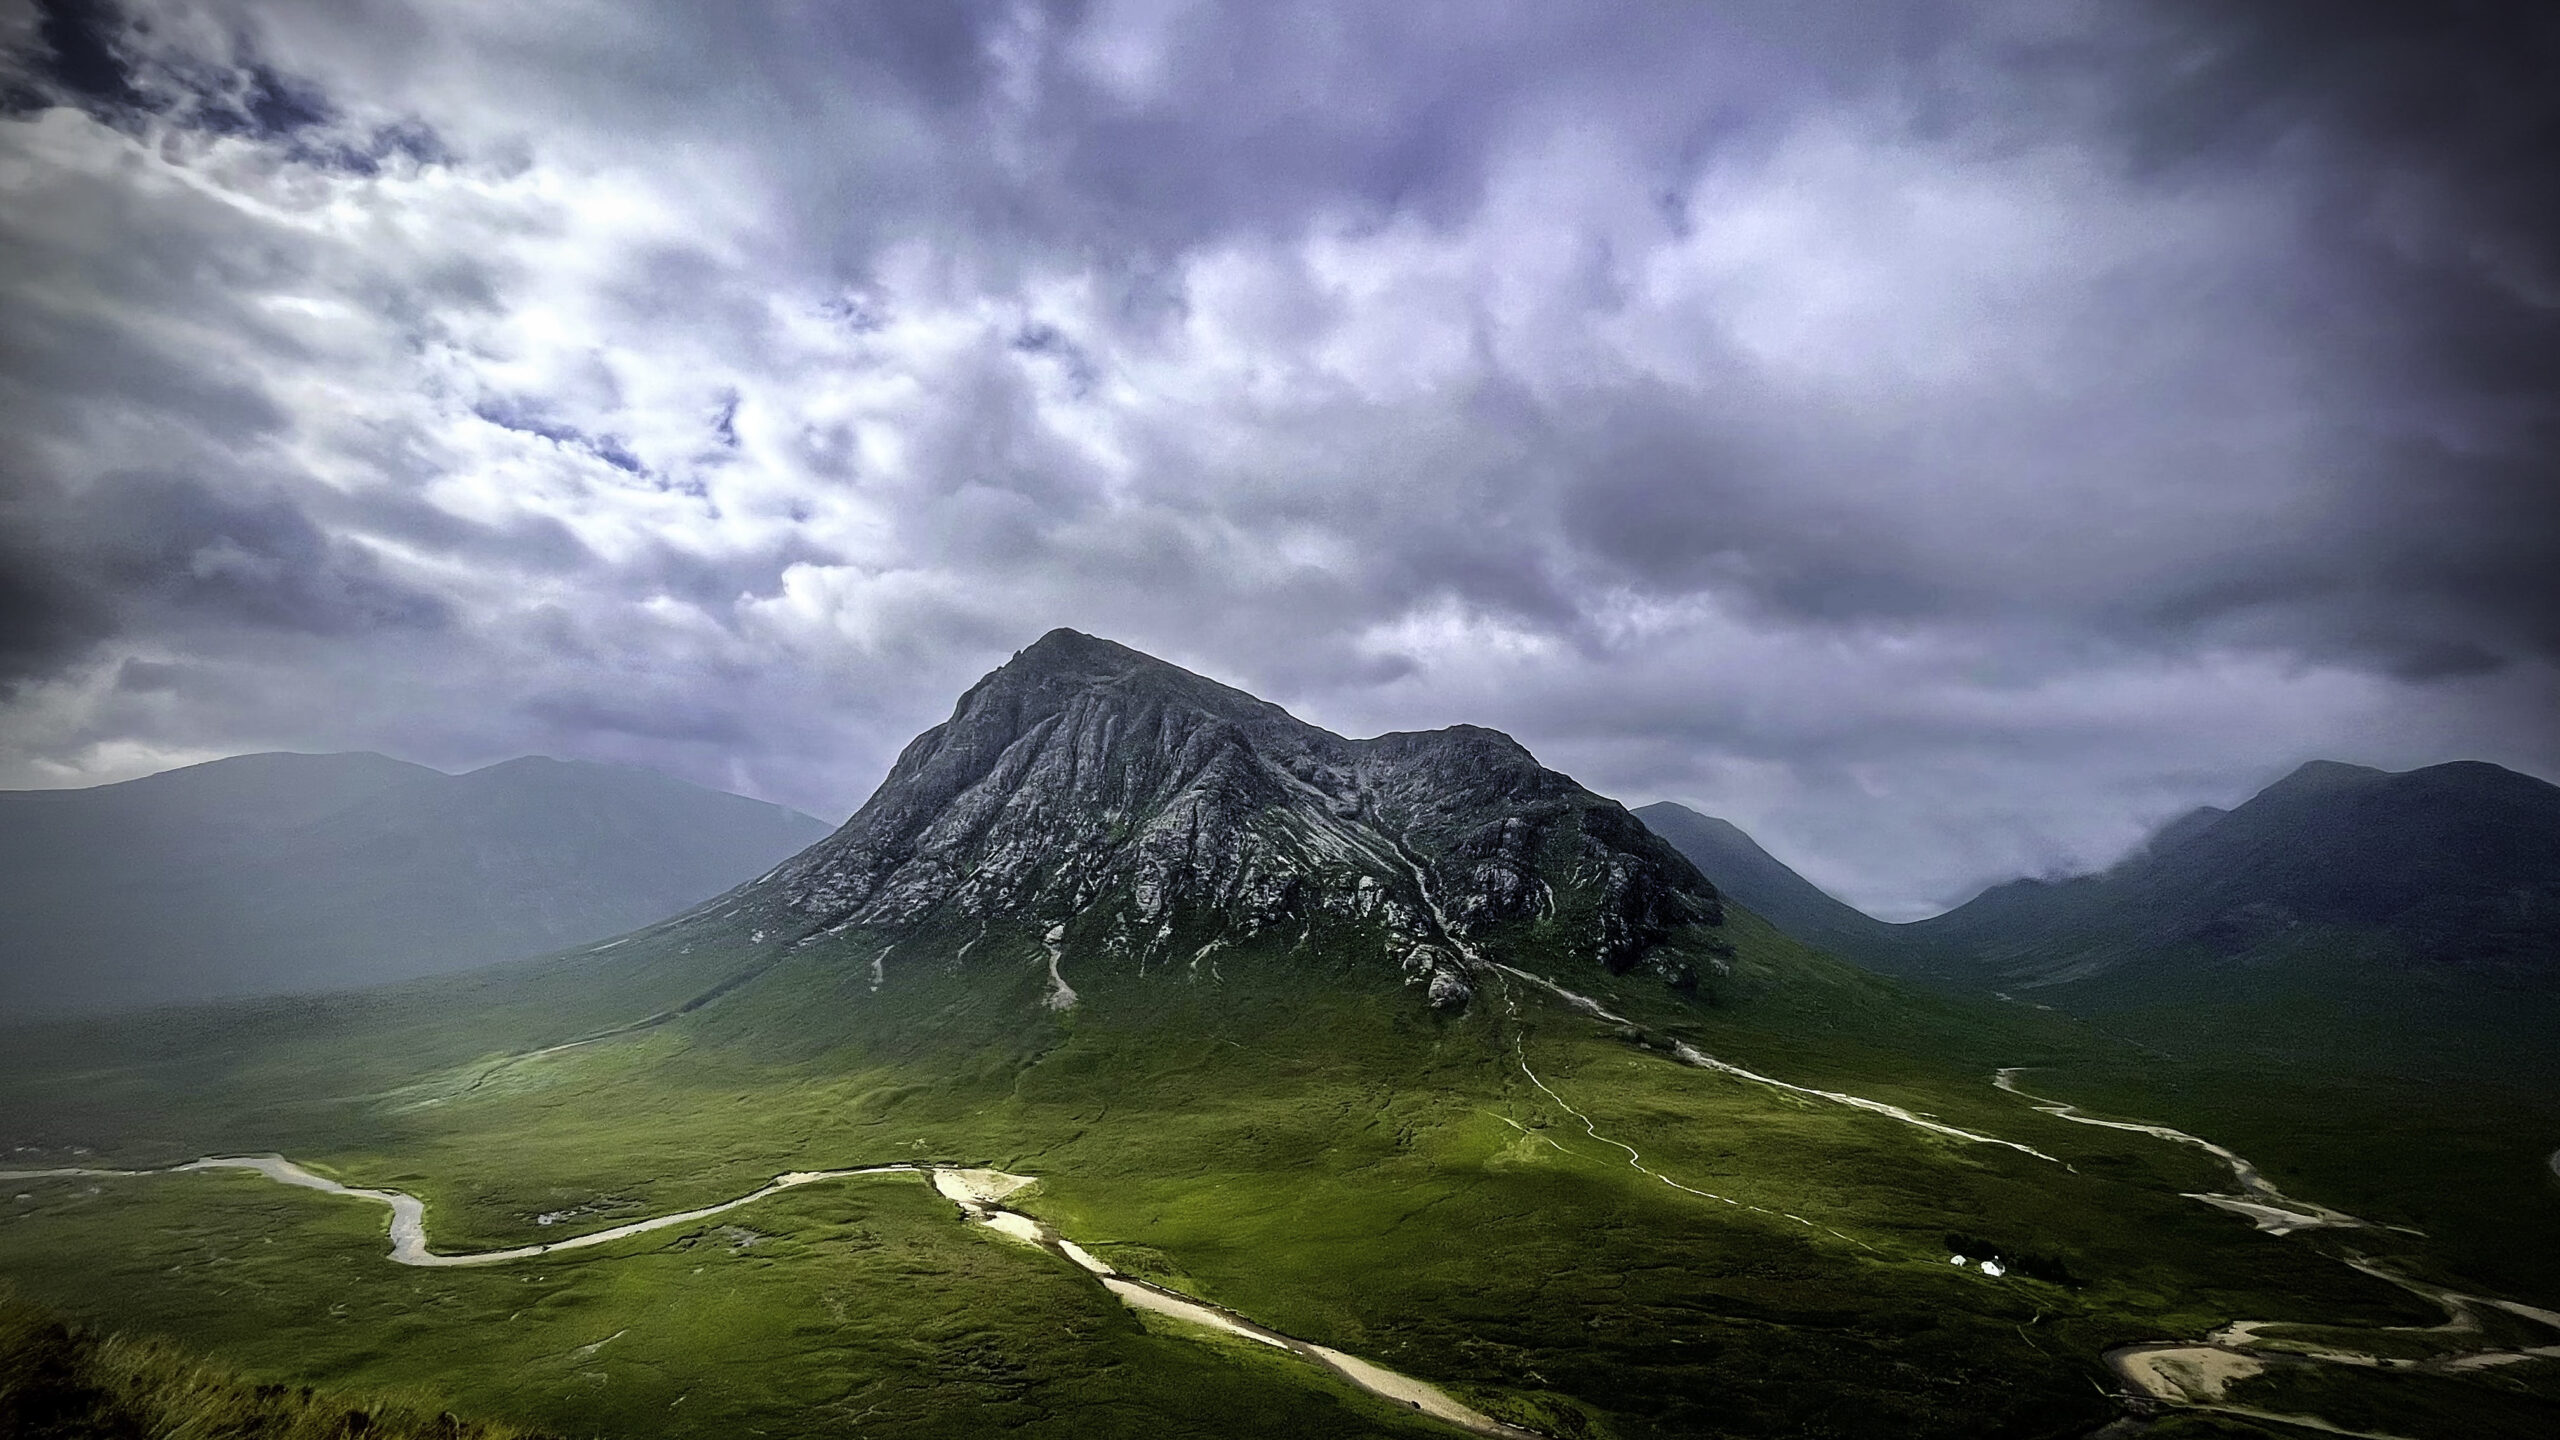
Check out my Portfolio
Landscape Shotkit
- Cameras
- Nikon Coolpix P950
- iPhone 12 Pro
- Tripods
- Packs
- 2x Peak Design Capture quick-release camera carry system, with Pro Pad
- Filters
- Nikon ML-L7 remote (bluetooth)
- Extra Batteries and Memory Cards
- Extra Nikon EN-EL20a Rechargeable Lithium-Ion batteries
- SanDisk Extreme Pro UHS-I 256GB memory cards
- Charging Kit
- Powertraveller Falcon 21 Solar Panel
- Powertraveller PowerGorilla Powerbank
- CaseProof Waterproof Solar Powerbank
- Wuben H1 Headlight
- Haago Body Warmers & Haago Hand Warmers
- Kamik Forester boots
- Euroschrim Light Trek Ultra Umbrella
- Camera Rain Cover
- Lens Cloth and Cleaning Kit
- Apps
- Milky Way Photography Equipment
Action Shotkit
- Cameras
- GoPro Hero 7 Black
- iPhone 12 Pro
- Nikon Coolpix P950
- Tripods
- Peak Design Capture quick-release camera carry system, with P.O.V. Kit
- Saramonic Blink 100 Wireless Microphone
- Shape Cold Shoe mounts
- GoPro Accessories
Cameras
Nikon Coolpix P950
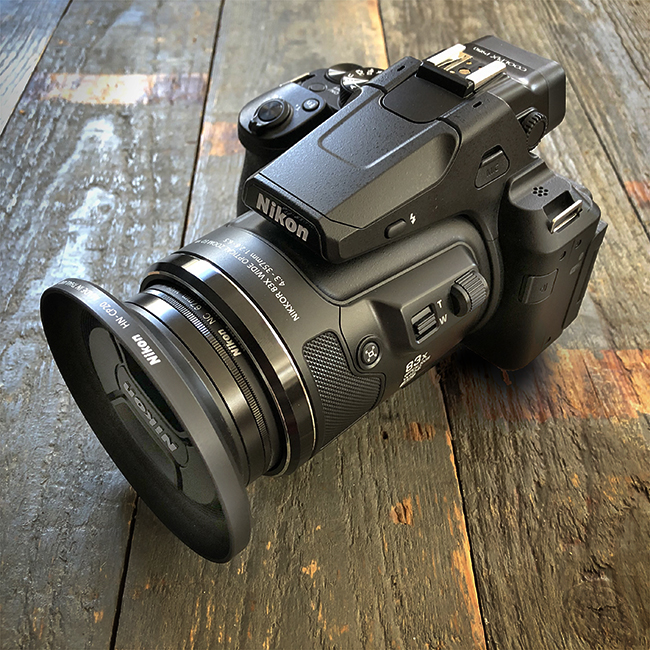
The Nikon Coolpix P950 is a digital compact (‘Bridge’) camera, especially suited for shooting anything you can’t get real close to. It has a 83x optical zoom, ranging from 24 mm wide angle to 2000 mm tele.
Underneath is a sample of what that looks like:
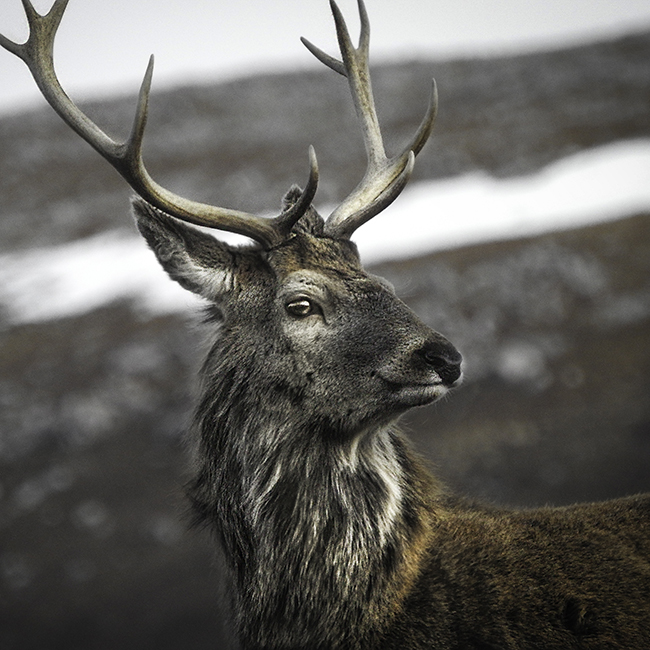
We all know how hard it is to find the right spot to make photographs or movies of paddlers, climbers and other outdoor subjects like wildlife. With this camera you can even go high ground and still get close enough. With it’s 16 megapixels and full HD-film capacity, the camera is able to make good pictures and movies.
The ‘super zoom’ in combination with the macro up to 1cm, equals carrying at least two extra lenses for conventional camera systems.
Now, this kind of zoom could be a handful to control. The camera comes with vibration reduction and has a zoom control on the left side to keep the camera stable. But even with those features, when using extreme zoom and with limited light, the use of a tripod and remote control is recommend.
There are some really good features on this camera:
- GPS is a great feature, for tracking your photography locations.
- The Wi-fi connection it can make with your IOS or Android device, enabling it to share your images online.
- The controls and features are easy to use and understand.
- It has a programmable function button, enabling to use your favourite function directly.
- The image stabiliser works very well.
- Eye detection will switch automatically from display to digital viewfinder.
- Brightness adjustment and rotating display guarantees a well readable display under all circumstances.
- 1600 ISO works good, but gets somewhat soft. 3200 & 6400 I’d use only for crisis situations.
- The grip and dials on this camera are ergonomically very well designed.
- The mic works pretty good but will pickup autofocus and lens movement sound
- It has plenty of preprogrammed settings (bird, moon, landscape, sunset et cetera.)
As a all-round nature and outdoor camera, it offers possibilities that are pretty unique to this camera. Is it all positive? That entirely depends on expectations. An outdoor camera, imho, should be weather-protected. Having all the features means the camera is rather big, but, you needn’t carry any extra lenses.
In any non-trekking situation, I keep this camera in a B&W outdoor type 2000 case.
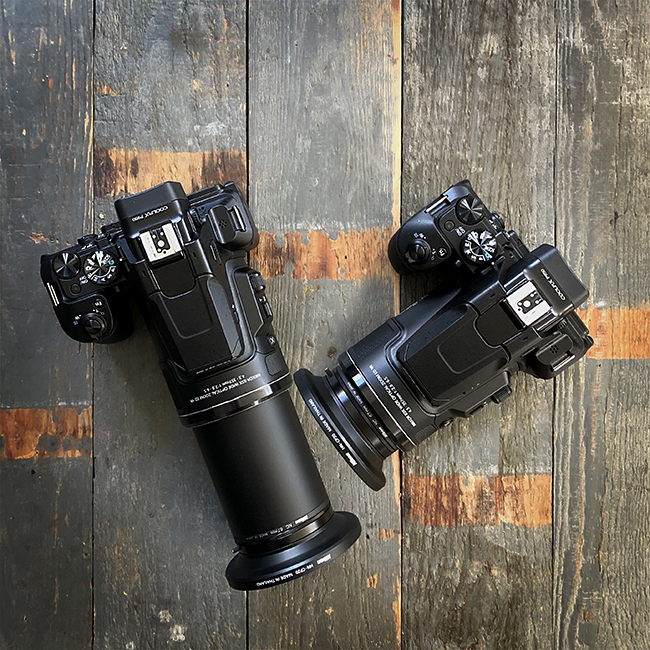
GoPro Hero 7 Black
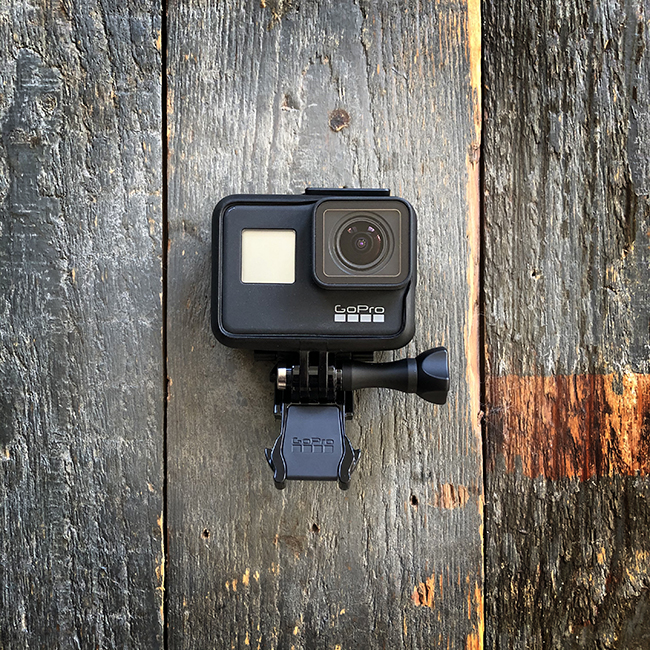
We all know the claims GoPro makes:
- Gimbal-like stabilisation–without the gimbal. Tough as nails and waterproof down to 33ft (10m).
- Go hands-free with 16 commands, including “GoPro, take a photo” or “GoPro, turn on.”
- Makes shots look amazing automatically with HDR, local tone mapping and noise reduction—in any light.
I use a limited amount of Accessories, see next chapter:
GoPro Accessories
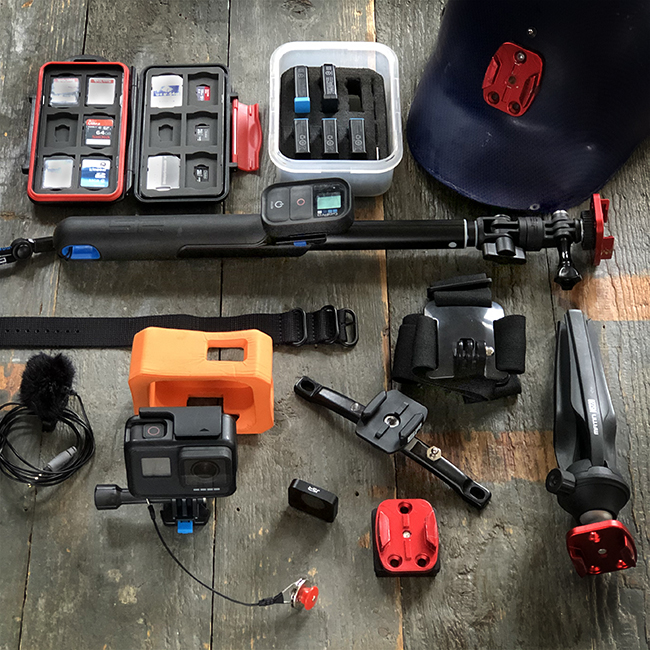
Little by little my ideal set of GoPro accessories is taking shape. This collection should service well in both kayaking, kayaking photography/filming and backpacking situations. I try to use mounting buckles (instead of ‘the fingers’) for all applications, because they are the easiest and fastest way of mounting. A breakdown:
A. My GoPro 7 Black, in it’s GoPro housing, but using a SP Gadgets ‘Safety Clip’ (which locks the clip in place).
B. A Tripod mount, a SP Gadgets ‘Stem Cap Mount’, on a Breakthrough Photography Arca Plate.
C. A Helmet mount, SP Gadgets ‘Stem Cap Mount’, ombined with a Loxx lower part to mount the tether to.
D. A SP Gadgets ‘40″ Remote Pole‘.
E. My front Kayak grip handle, fitted with a SP Gadgets ‘Stem Cap Mount and a Loxx M6 Lower part to connect the tether to.
F. A Headmount (meanwhile fitted with a SP Gadgets ‘Clip Adapter’)
G. Saramonic Blink 100 Wireless Microphone
H. A Floaty for use on and around the water.
I. A GoPro Remote which I use on the Remote Pole (D),and with:
J. A GoPro Remote wrist band.
K. A Loxx coloured big head Upper part, as part of my goto Tethers, based on the Sheaffertec Loxx system.
L. A generic Neutral Density 8 Filter (-3 f-stop reduction), for shooting in really sunny conditions.
M. A waterproof container, containing spare batteries and memory cards, 128GB SanDisk SDXC Ultra Micro SD-cards (100MB/s), carried in the kayak.
N. A Caruba memory card case, with all my memory cards, both SD and MiniSD (12 of each).
O. My SP Gadgets ‘Tripod Grip’ .
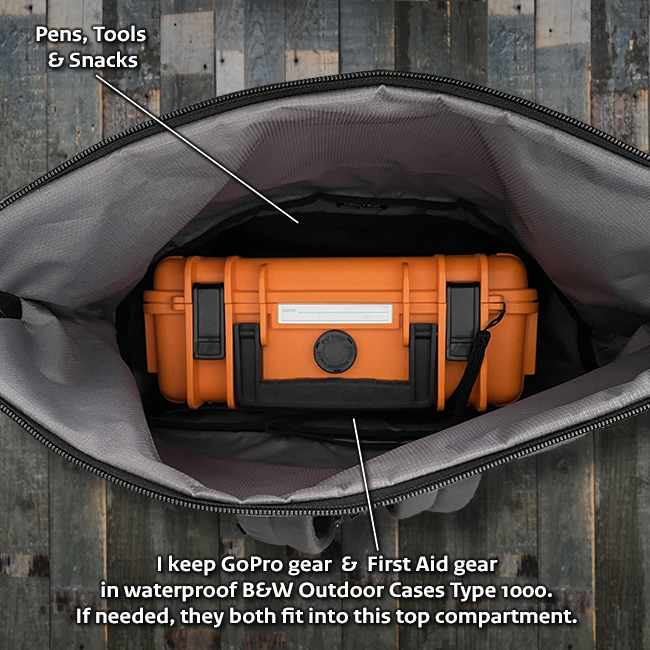
In any non-trekking situation, I keep this camera in a B&W outdoor type 1000 case.
Saramonic Blink 100 Wireless Microphone
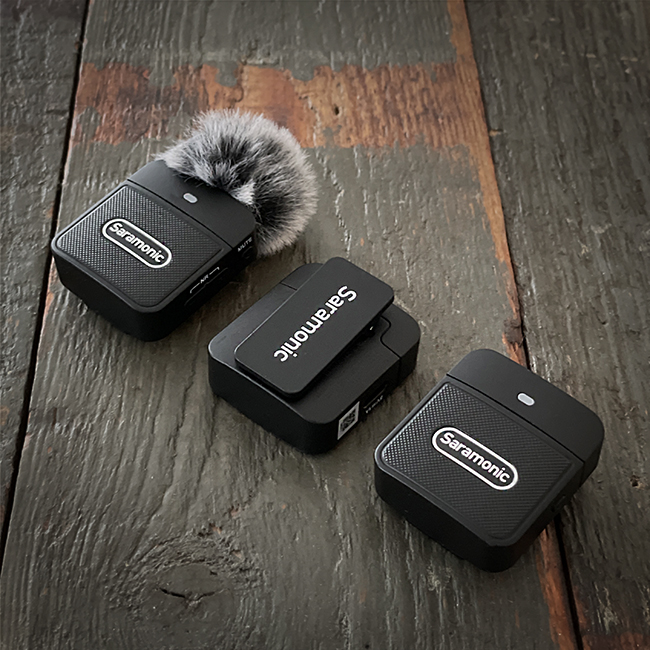
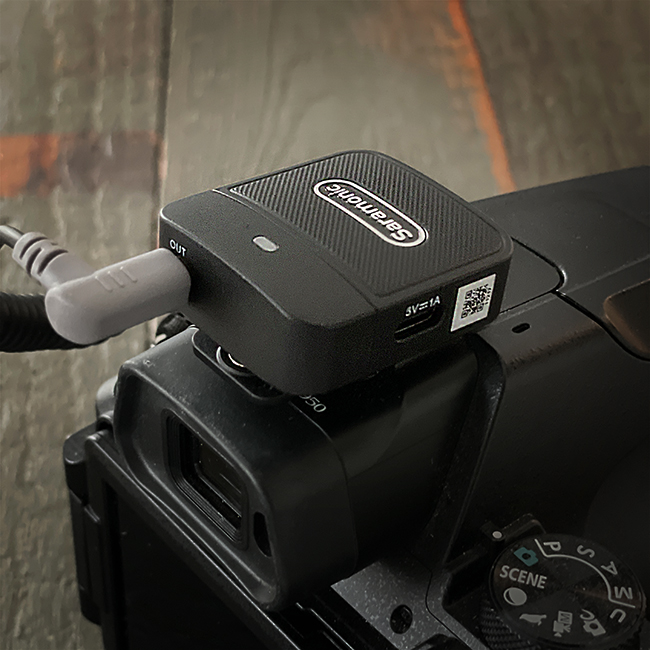
I use a set of Saramonic Blink 100 B2 set of wireless omnidirectional microphones, both with my Nikon as with my GoPro camera”s. This is an ultralight and ultracompact set of mics, providing an excellent sound quality. The automatic pairing, plug-and-play action and very easily selectable noise cancellation are great features for field recordings. At a weight less than 16.5g per element, they are no burden to carry in their practical small softcase. They measure a mere 39×35×14mm each, which is small enough not to be visually dominant in recordings. I use the ‘faux fur’/’dead cat’/’wind muff’ windscreens by default.
Fotopro X-Aircross 2 Carbon Tripod
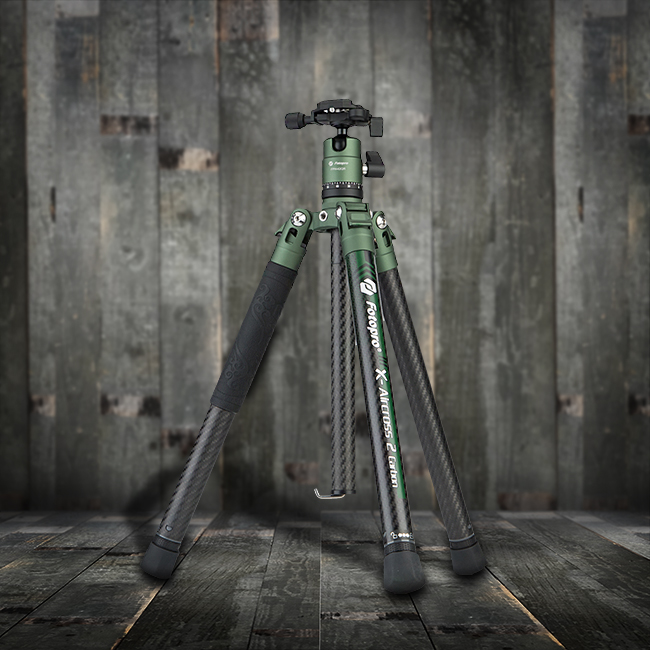
My sturdy and robust Fotopro X-Aircross 2 Carbon Tripod. It has twist locks on the 5 segments legs so it slides into backpacks easily. The overall quality of this tripod is outstanding! It is very secure and robust, whilst being lightweight. It has more features than expected of a travel-tripod, like the extesion sockets and the multi-functional had.. These features do cause additional weight, but they also offer extra possibilities for the serious/advanced photographer. One of the important features is the option to take off the center pole, enabling it to be used very low and less wind sensitive. Another main feature is the two screw sockets allowing the attachment of accessories. It offers operating heights from -30 cm (rather than the stated 17 cm) up to 151 cm, using the detachable center pole. With the column reversed for macro photography, it can reach down to 30cm below ‘ground level’. This allows extreme closeups in vry uneven leveled terrain. The max load of 10 kg facilitates attaching accessories and to weight the tripod down (for use in river stream, or in very windy conditions).
A full service tripod disguised as a travel tripod!
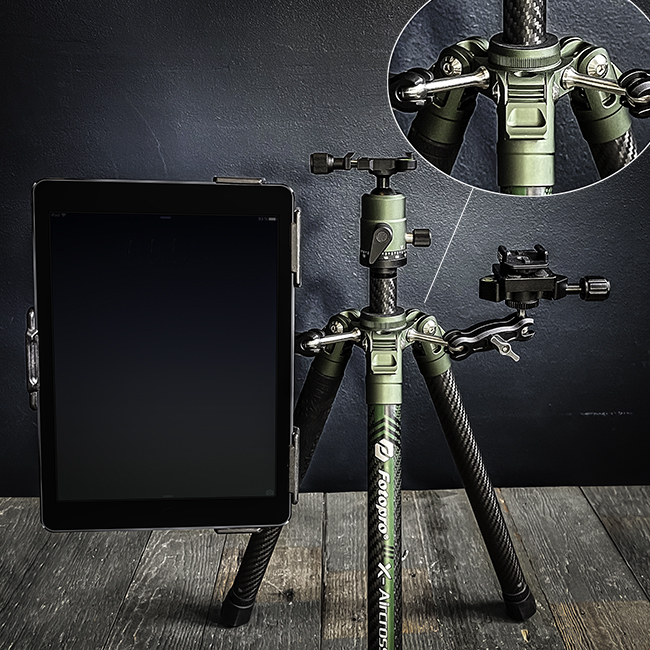 | 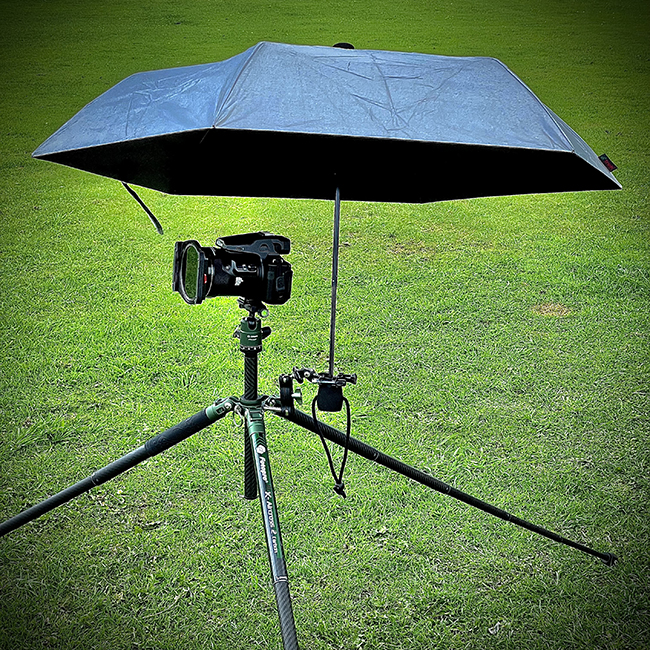 |
| The two screw sockets used for a monitor (iPad) and a GoPro mount. In this picture they are connected using Fotopro GS-1 connectors. | Utilizing the screw socket for mounting an umbrella to keep the camera dry. |
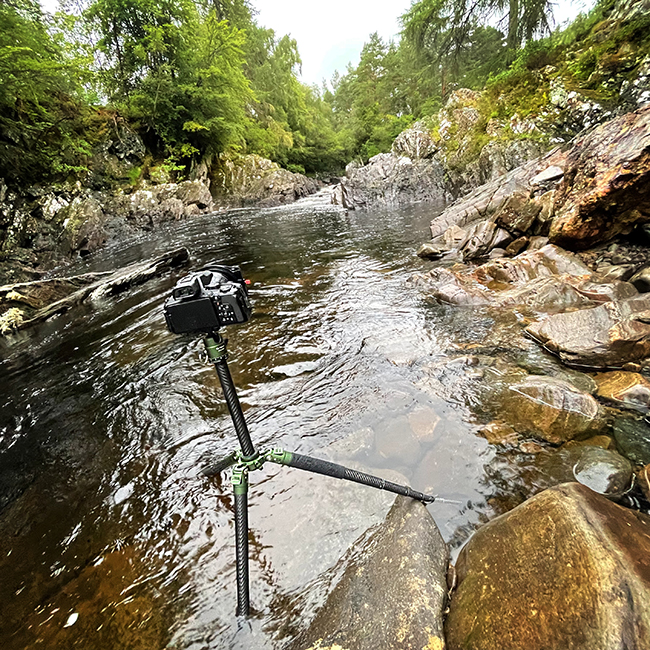 | 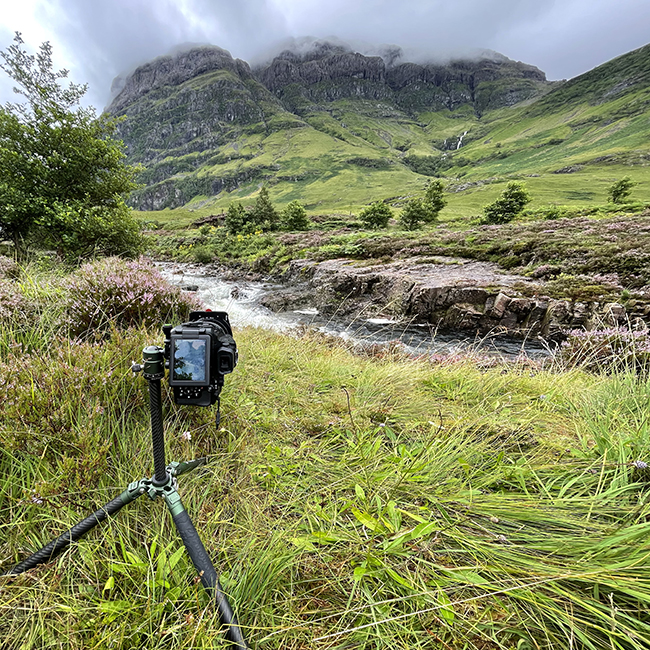 |
| Finding the best camera (wet) angle at Cassley Falls, GlenCassley, Scotland. | A scene at Glencoe, Scotland, with a clouded Aonach Dubh in the background. |
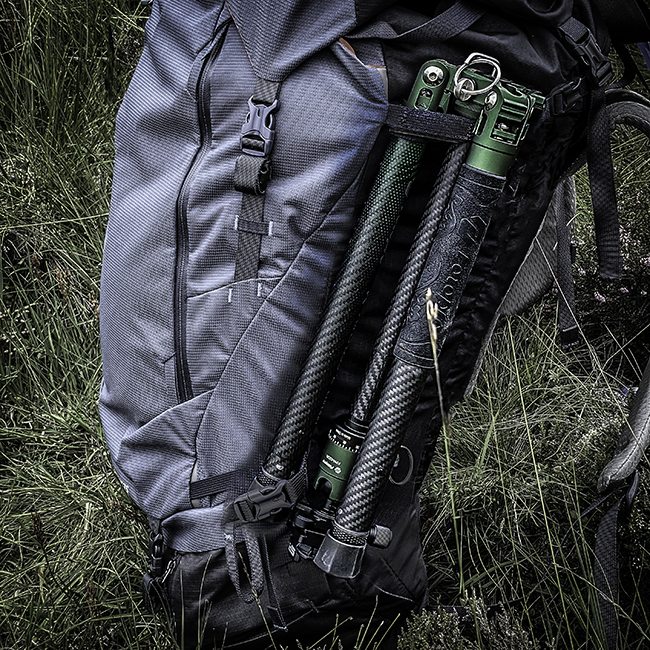 | 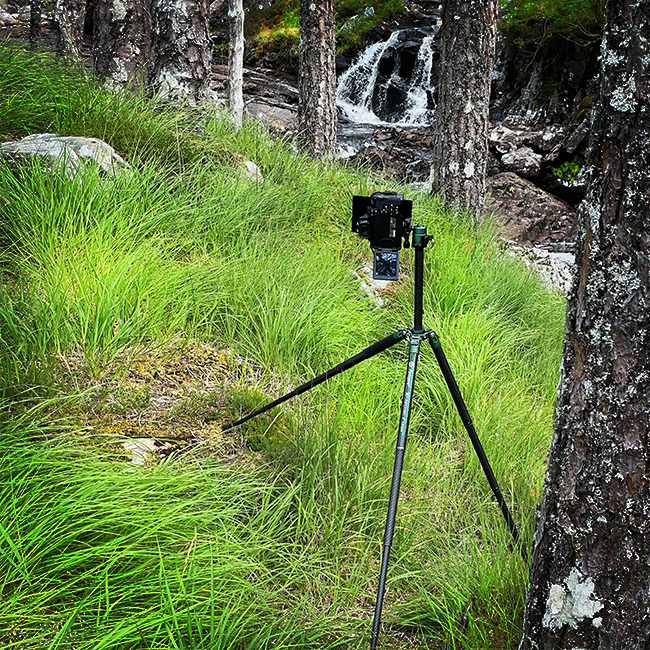 |
| The X-Aircross 2 packed on my pack. | Finding the best camera angle on a sloped spot at Allt Langwell falls, Glencassley, Scotland. |
The Eckla-Camfix Car Window Mount
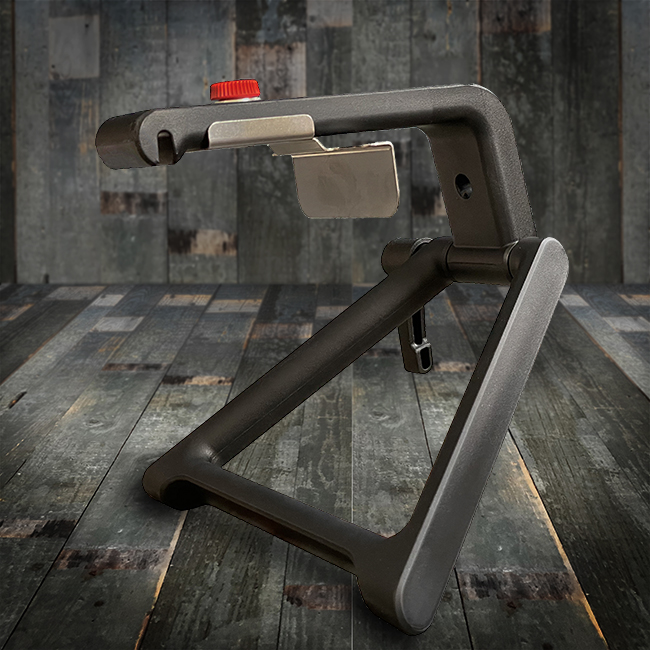
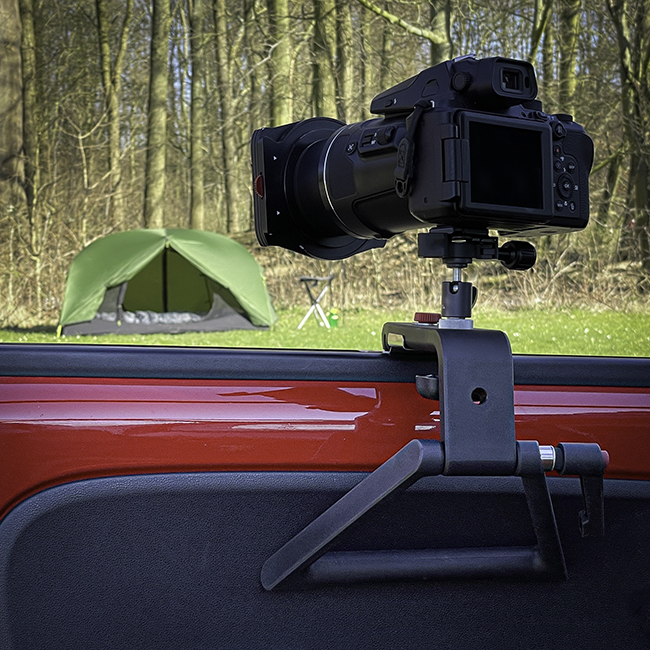
This is my car window camera mount. The ECKLA-CAMFIX. The ultimate solution for wildlife and landscape photography out of the car. Within seconds I’m ready to shoot deer, eagles and other wildlife. It mounts in different ways, depending on the situation, insde or outside the car door, either on the window, into the window ledge or on the roof, interior or exterior, whatever I want. It is very well padded, to prevent damage to the cr. I use it with a simple ballhead for fast deployment. Besides that, it’s a very sturdy astral photography tripod ánd an excellent table top tripod!
- Weight: 760 grams
- Folded dimensions: 220 x 200 x 75mm.
- Materials: steel frame with a soft polyurethane coating.
 |  |
Filters
Kase Wolverine K100 Master Kit
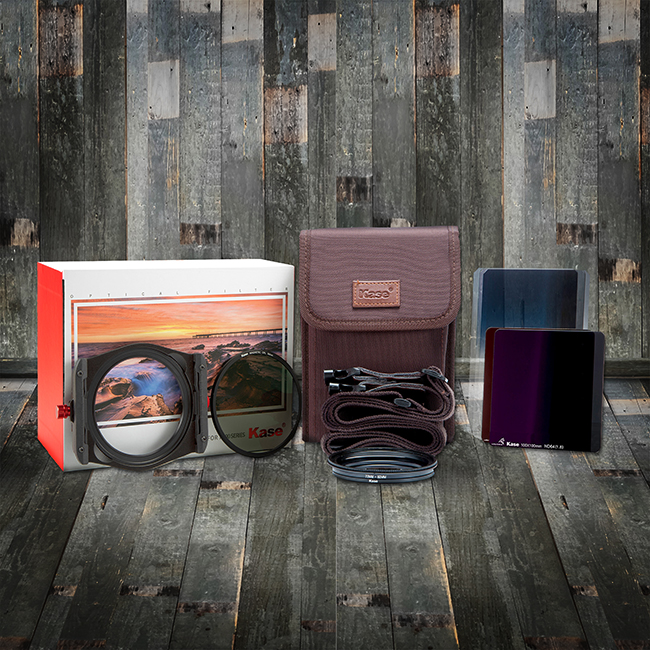
Now here is a vital part of my photography equipment: my Kase Wolverine K100 Master Landscape Filter Kit! Using good quality landscape filters is essential for this type of photography. Many of the filtering that can be done ‘in the field’ is very hard, if at all possible, in post production. Having filters at hand creates loads of opportunities.
This particular kit consists out of a filter holder that comes with adapter rings, a Deluxe bag, a magnetically mounted Circular Polarizer and several 100x150mm slot-in filters:
| Filter Type | Filter Factor | Optical Density | F-stop reduction |
| Hard GND filter | 0.6 | 4 | -2 |
| Soft GND filter | 0.9 | 8 | -3 |
| Soft GND filter | 1.2 | 16 | -4 |
| Reverse GND Filter | 0.9 | 8 | -3 |
| ND Filter | 1.8 | 64 | -6 |
The GND (Graduated Neutral Density) is used because a camera is not able to see very bright areas (usually the sky) and very dark ones (normally the rest of the scene) at the same time. You can use these filters to cover the bright area of the scene, matching its brightness with the darker area of the scene.
The transition area on the filter, between light (transparent) and dark (ND) determines the type of GND filter you’re working with. I use a Hard Edge, Soft Edge and Reverse GND flter.
1. Hard Edge filters are characterised by a clear boundary between the transparent and ND area, used when the separation between the bright and the dark areas of the scene is very defined, such as the horizon at sea.
2. Soft Edge filters are characterised by a soft transition, used where the transition between light and dark areas is not so clear. A classic example is a shot in a mountainous area.
3. Reverse filters are nothing more than Hard Edge filters with the ND effect that fades away upwards, for when the light is more intense on the horizon line.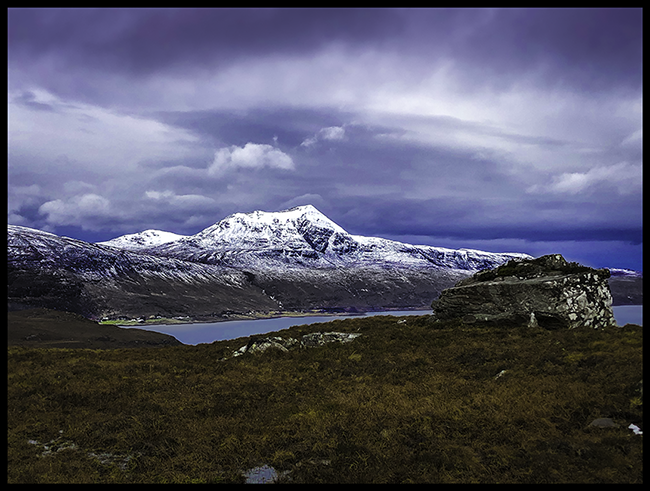
Soft Edge GND (0.9)
ND (Neutral Density) filters cannot be recreated in post-production. In landscape photography their task is to decrease the shutter speed. A well known example is to create a water flow effect (as the shutter stays open longer, to catch enough light, the movement of the water is captured as motion blur: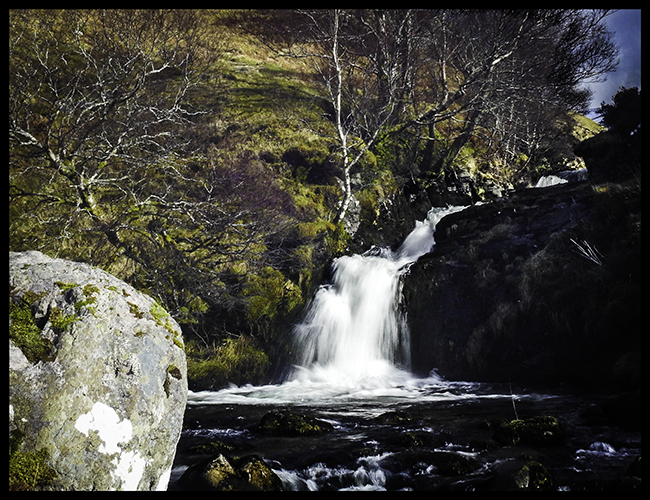
ND 1.8
A CPL (Circular Polarisation) filter is used for eliminating unwanted reflections and reflections on surfaces such as leaves, glass or water. A less obvious example is this self portrait, with beautiful frosted dew (looking ‘dry’ and not over-exposed):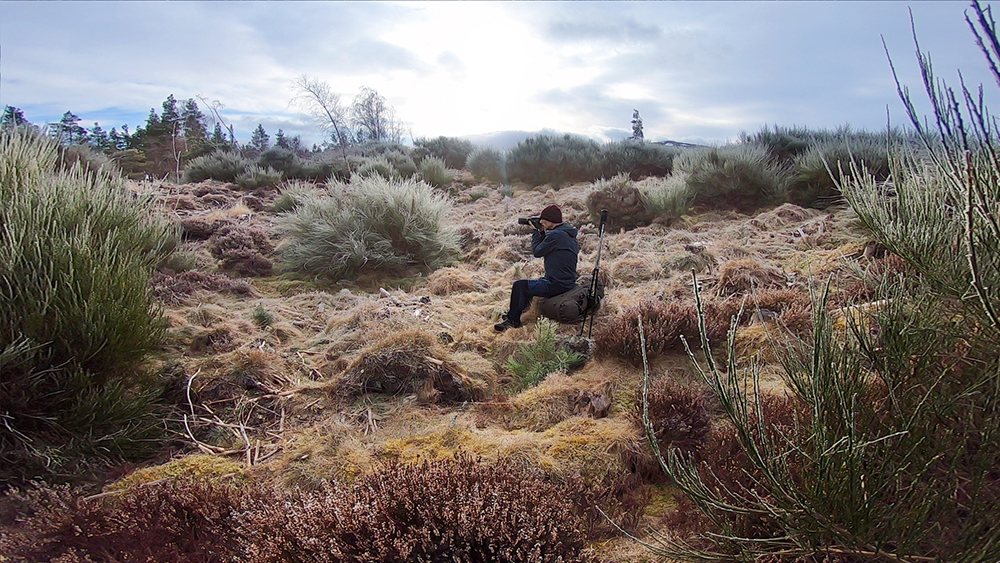
CPL
Breakthrough X4 Dark CPL filter
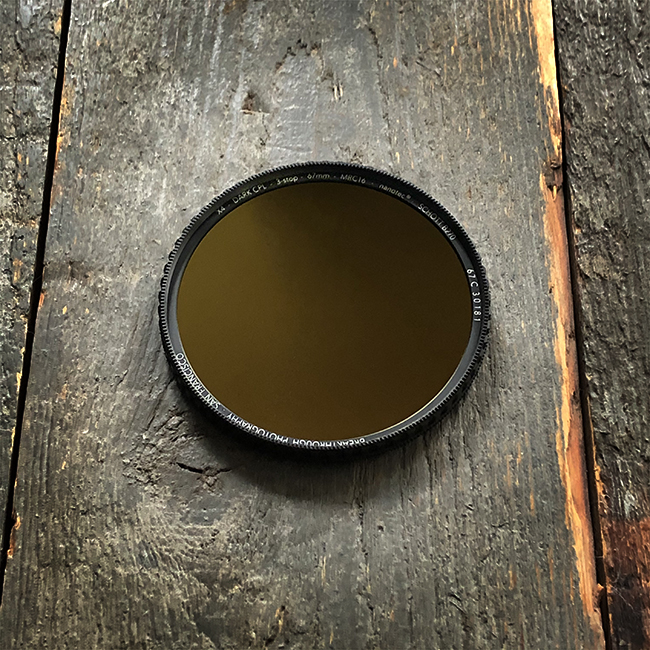
The Dark CPL is an exceptionally well-made multi-purpose filter, combining the Breakthrough X4 ND and the X4 CPL filters. No matter how good your slot-in system is, stacking filters has the potential to increase flare effects, due to the increased number of glass surfaces. Another issue can be mechanical vignetting when using wide angle focal lengths. This Breakthrough Photography X4 Dark Circular Polarizer Filter solves these potential problems by combining the two filters. I have yet to find any flaws with regards to: loss of white levels, color-neutrality or image-sharpness. In fact I see some considerable repair of chromatic aberration. A must have in your case!
Brinno Time Lapse Camera

The Brinno TLC2020C is an easy-to-use professional time-lapse camera, with several capture and exposure modes for different times of the day, and tough when seated in its waterproof housing. The TLC 2020 is available in a variety of kits. I use the Brinno TLC 2020-C (Construction) Bundle with Housing & Mount kitIn this kit, you get the TLC 2020 Camera, the waterproof housing, a lens cap, a lens screwdriver, a USB-C cable, silica gel (to combat condensation in the housing), two bungee cords, four AA batteries, a Clamp Mount Kit ACC1000P, a 16GB microSD card and SD adaptor.
Measuring just 60 x 70.6 x 46.6mm and weighing 6190g, including batteries and a microSD card, it’s a small and lightweight camera, and using the waterproof housing only adds a small amount of size and weight. The housing has rubber buttons for controlling the camera, a compartment at the bottom to hold the included silica gel to avoid condensation, and provides IP67 water resistance. It’s made of tinted plastic, except for the clear lens section, so it’s best to adjust exposure with the rear door open.
The TLC 2020 runs on standard AA batteries or can be powered externally via the USB-C port on the side of the camera. The great thing about this camera is that it’s well-equipped for shooting long-form time-lapses that are days, weeks, or even months in duration. It also has a few features up its sleeve that make it a versatile option beyond its ability to capture time-lapse videos. The TLC 2020 can also shoot Step Video, where you record short videos at set intervals, Stop Motion, for creating animation videos, and it can capture photos at 1080p. The settings available for adjusting images include exposure compensation, white balance, sharpness, contrast and saturation, with an HDR option to increase detail when required.
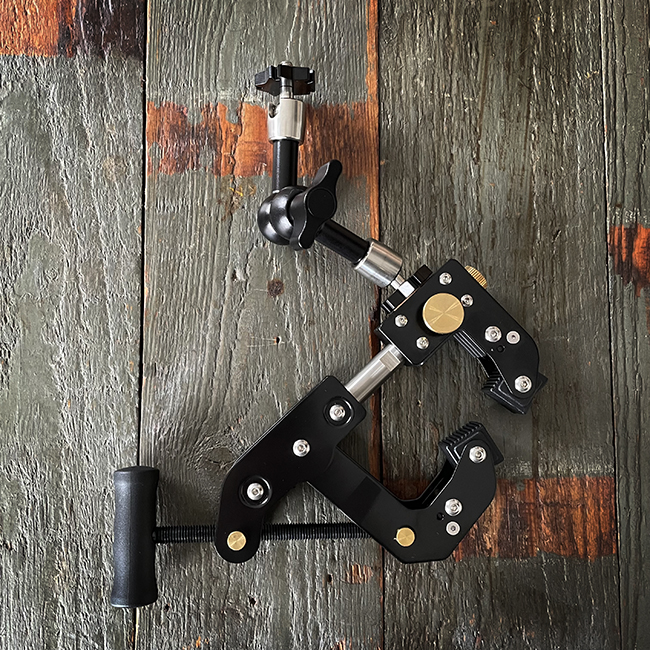
ACC1000P Clamp is Industry-grade constructed with multiple heavy duty extension poles, giving adjustable clamping range between 1 mm and 390 mm , and further extendable to a MAX of 270 mm. I‘ll always get the right clamping performance no matter the grip is on a small narrow workpiece or on a large brick wall. It has a 360 degree rotating tripod ball joint with 90°tilt.
Accessories
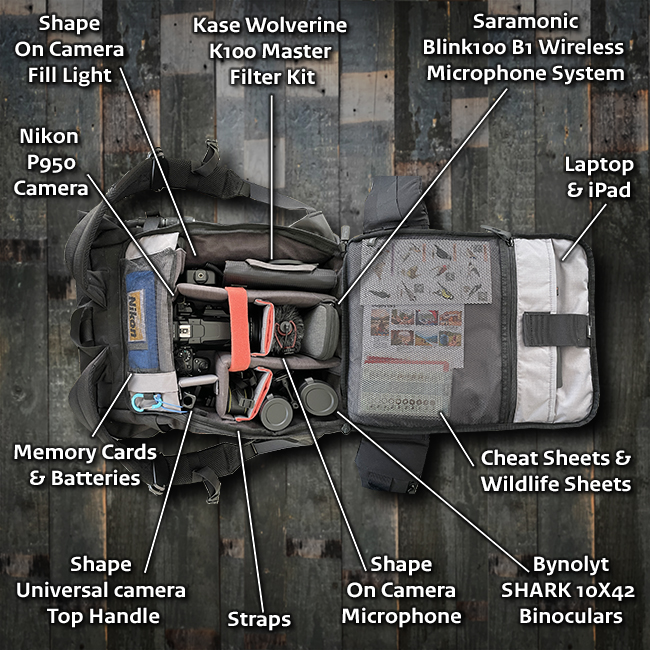
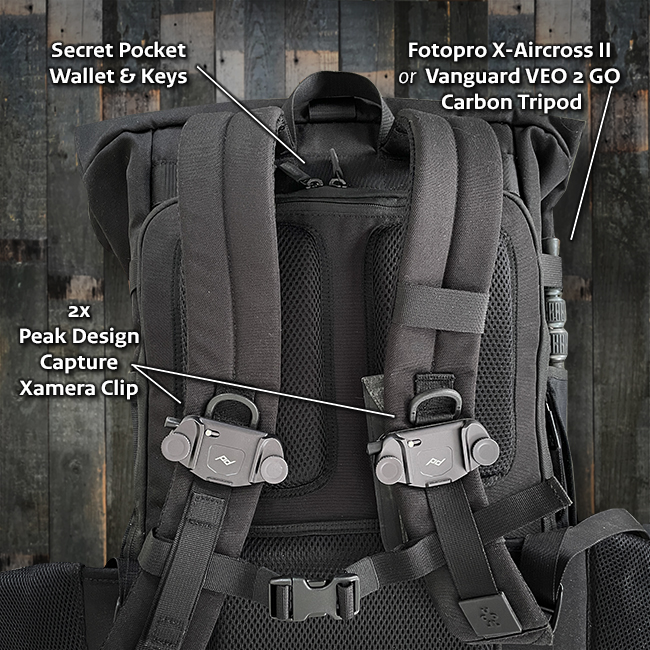
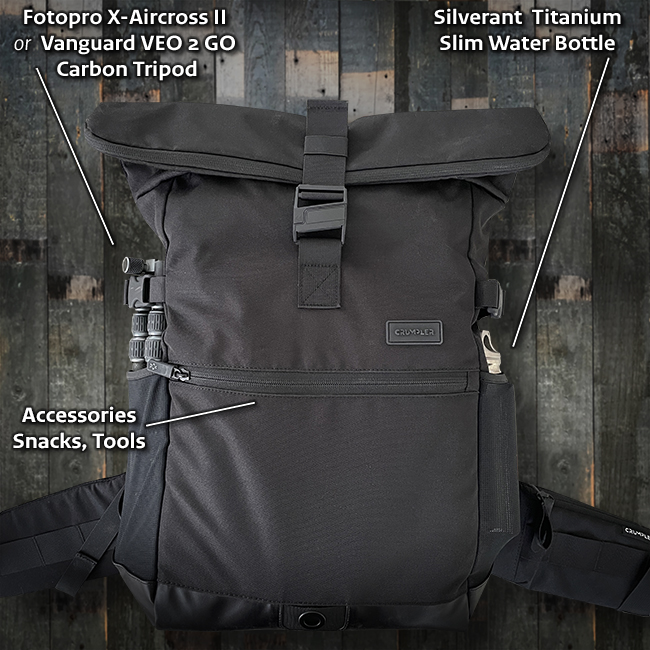
Crumpler Creator’s Road Mentor Backpack
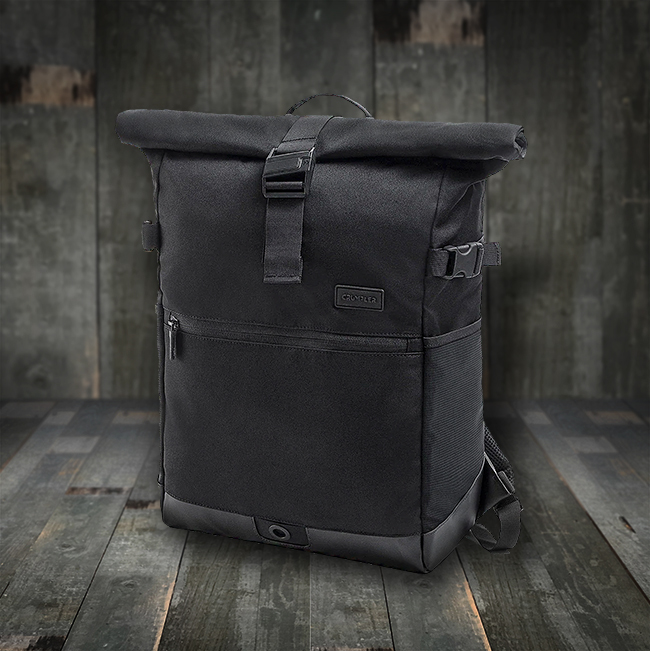
The Crumpler Creator’s Road Mentor Backpack is my trusted camera backpack. This is a 100% recycled PET pack! It has up to 28 liters of practical, well protected, easily accessible and clever storage space. It’ll fit almost any camera body and lenses up to 20cm physical length and loads of accessories. I think, considering the size and packability of this pack, that the optional Waist Belt is a mandatory accessory.
 |  |
 |  |
Shape Cold Shoe mounts
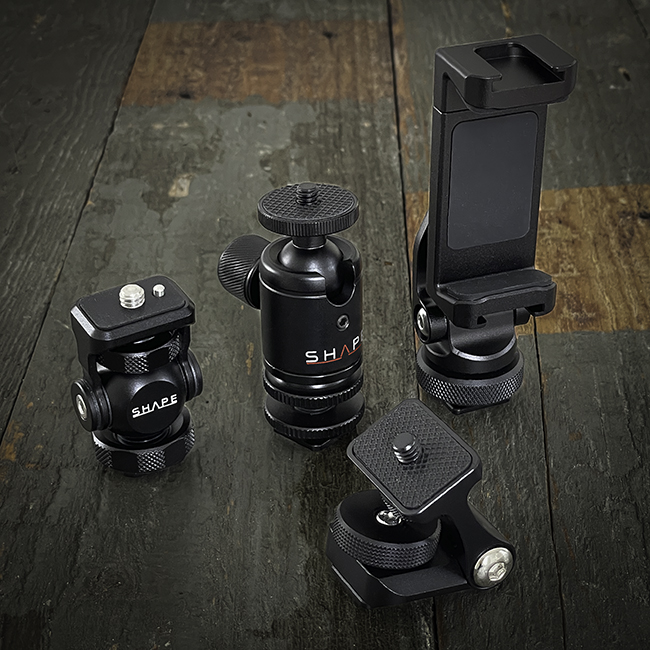
This is my allround Shape cold shoe mounts set. A set to carry for unforeseen circumstances, odd situations and creative madness. All my on-camera mounting needs are covered by these. The CNC aluminum mounts are robust, yet lightweight and very well designed. They will do the job!
Friction swivel and tilt base (left)
This device is perfect for finding the right tilt angle for your monitor, light, microphone or any other light camera accessories. It is ¼”- or cold shoe mounted with a securing thumbscrew. The accessory can be mounted using the ¼” thumbscrewed bolt and it has an antirotating pin. The swivel mechanism can be locked in place with a (provided) HEX key.
Ball Head 1/4-20 (center)
This 360° Rotation ball head is hot/cold shoe mountable and will attach devices using a ¼” thread. With a load capacity of 2,2 kg it is a very reliable piece of equipment.
Friction Swivel and Tilt Smartphone Clamp (right)
This clamp fits Smartphones 2.5 to 3.5” Wide. The clamphas protctive rubber pads for protection. Equiped with a swivel bracket, a female cold shoe, and a male cold shoe to mount to your camera, it’ll tilt a smartphone up and down in a secure way. The female cold shoe on top is perfect to attach microphone, LED video light or any other compatible devices. A male cold shoe with thumbscrew knob attaches the device to the camera body.The swivel mechanism can be locked in place with a (provided) HEX key.
Friction Tilt cold shoe mount (front)
Another device perfect for finding the right tilt angle for your monitor, light, microphone or any other light camera accessories. It is ¼”- or cold shoe mounted with a securing thumbscrew. The accessory can be mounted using the ¼” thumbscrewed bolt and it has an antirotating pin. The swivel mechanism can be locked in place with a (provided) HEX key.
RailBlaza Camera Mounts
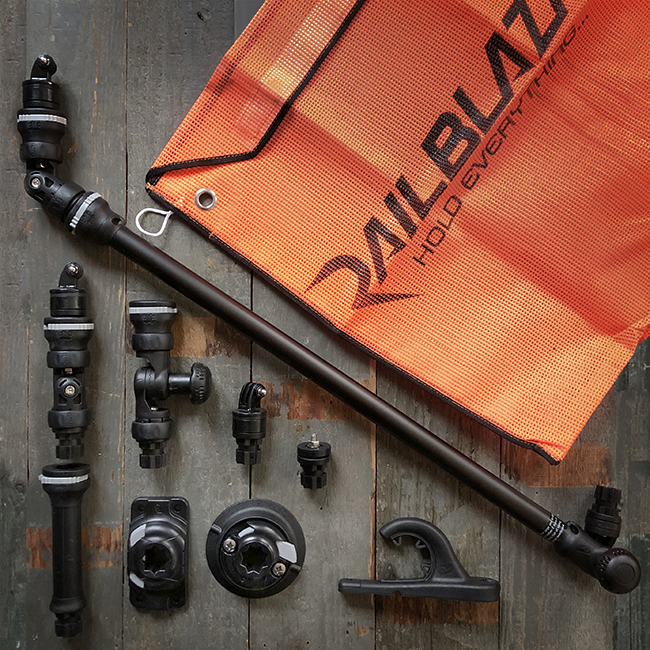
I sincerely think that RailBlaza has the best action camera mounts you could wish. Secure, easy to operate, flexible configuration and loads of possibilities to suit our specific preferences. These connections are really solid, no wobbling/slack/movement. I own a whole range of their gear, which actually is very affordable, and dealers are readably available throughout Europe. Shown in my pictures is the GoPro connector, but this can be unscrewed which reveals a standard 1/4″ bolt.
I’ll show you the sets I personally like best, but you may want to configure your own favourite set.
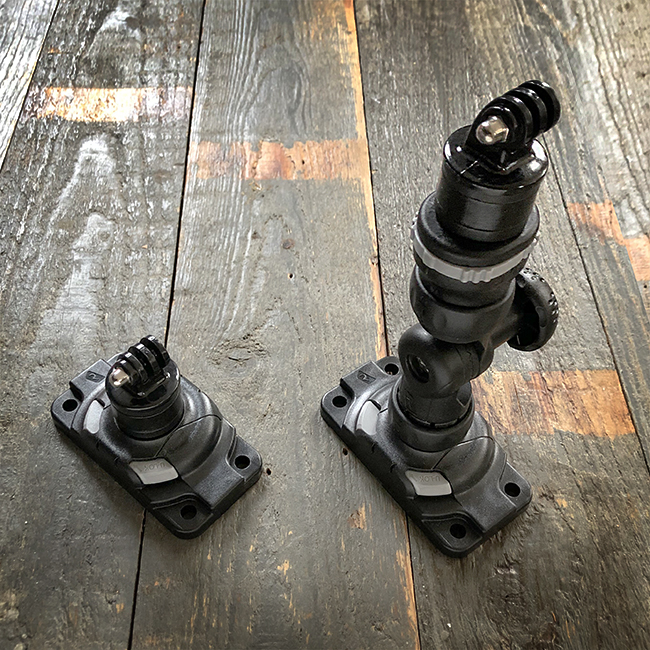
My bow deck set comes in two variations:
The ‘shallow water’ set, which I use when I don’t want the camera to be high above the deck, consisting of the Camera Mount Adaptor mounted on the Starport HD, with a bolt height of 6,5 cm.
The ‘Big Water’ set, which I use if there is no risk of the camera catching rocks or trees, consisting of the Adjustable Extender R-Lock mounted on the Starport HD, with a bolt height of 19,5 cm.
Depending on your kayak model, the Fixed Extender and Camera Mount R-Lock (rotating), can be great options.
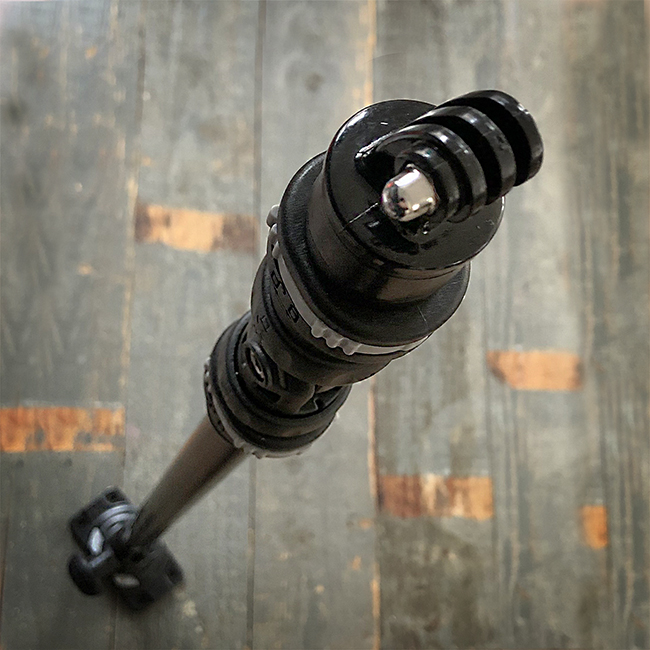
My stern deck set is meant to facilitate ‘over shoulder filming’. using the Camera Boom 600 R-Lock mounted on the Starport HD, with a camera height of 70 cm.
